Swift Package Collections is a new feature in SwiftPM that allows you to group multiple packages together and distribute them as a single unit. This is useful for situations where you want to share a set of related packages with others, or for organizing your own packages for internal use. In this tutorial, we will walk through the process of creating a Swift Package Collection and using it in a project.
Step 1: Define the input of the package collection in a JSON file
To get started, create a JSON file describing the metadata for the collection and the packages to include. The packages, at a minimum, should contain a Github URL, but you can also specify additional information to narrow down what is to be included from the package. Check out the README to learn more about the options.
 1{
 2  "name": "Collection Example",
 3  "overview": "This is a sample package collection.",
 4  "keywords": [
 5    "SwiftUI Navigation",
 6    "Composable Architecture"
 7  ],
 8  "packages": [
 9    {
10      "url": "https://github.com/pointfreeco/swift-composable-architecture"
11    },
12    {
13      "url": "https://github.com/pointfreeco/swiftui-navigation"
14    }
15  ],
16  "author": {
17    "name": "Jane Doe"
18  }
19}
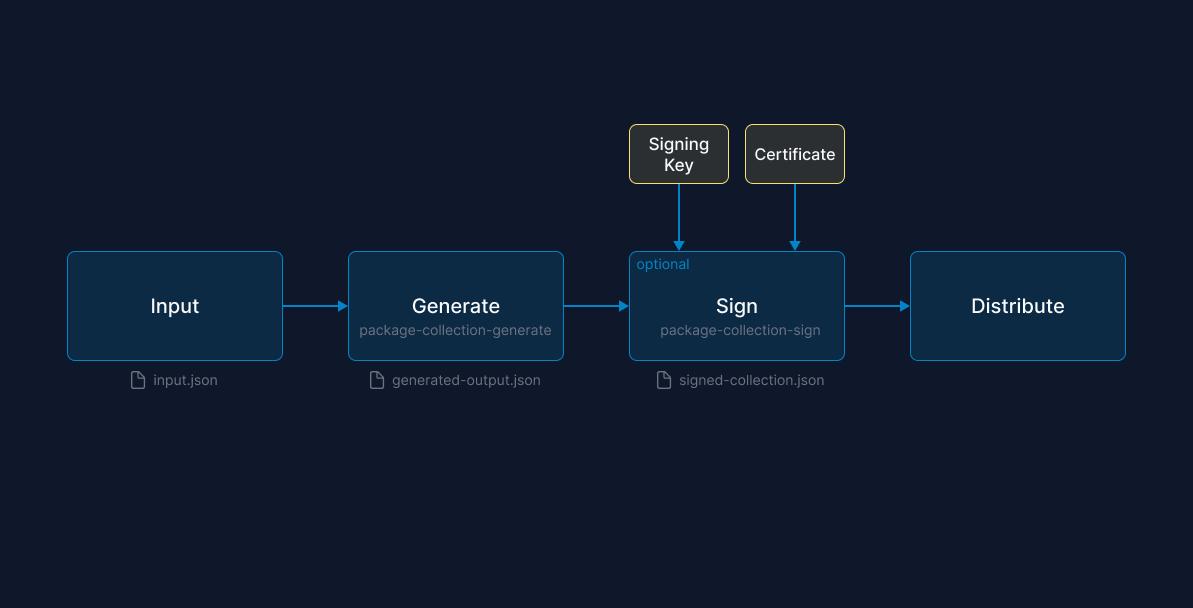
Step 2: Generate the output file with the package-collection-generate command
Apple provides the package collection generator to simplify generating the collection by filling in the detailed metadata from the repositories, including a complete list of the available versions.
The package collection generator does not currently ship with the Swift toolchain, so it needs to be built from source.
Clone the git repository.
$ git clone https://github.com/apple/swift-package-collection-generator.git .
Build the generator from the source.
$ swift build --configuration release
Install the commands on your system path.
install .build/release/package-collection-generate /usr/local/bin/package-collection-generate
install .build/release/package-collection-diff /usr/local/bin/package-collection-diff
install .build/release/package-collection-sign /usr/local/bin/package-collection-sign
install .build/release/package-collection-validate /usr/local/bin/package-collection-validate
Now with our input.json, the generator csn fill in additional metadata on each package from GitHub.
$ package-collection-generate input.json generated-output.json
The generated-output.json is now a complete description of our package collection.
Step 3: Sign Collection (Optional)
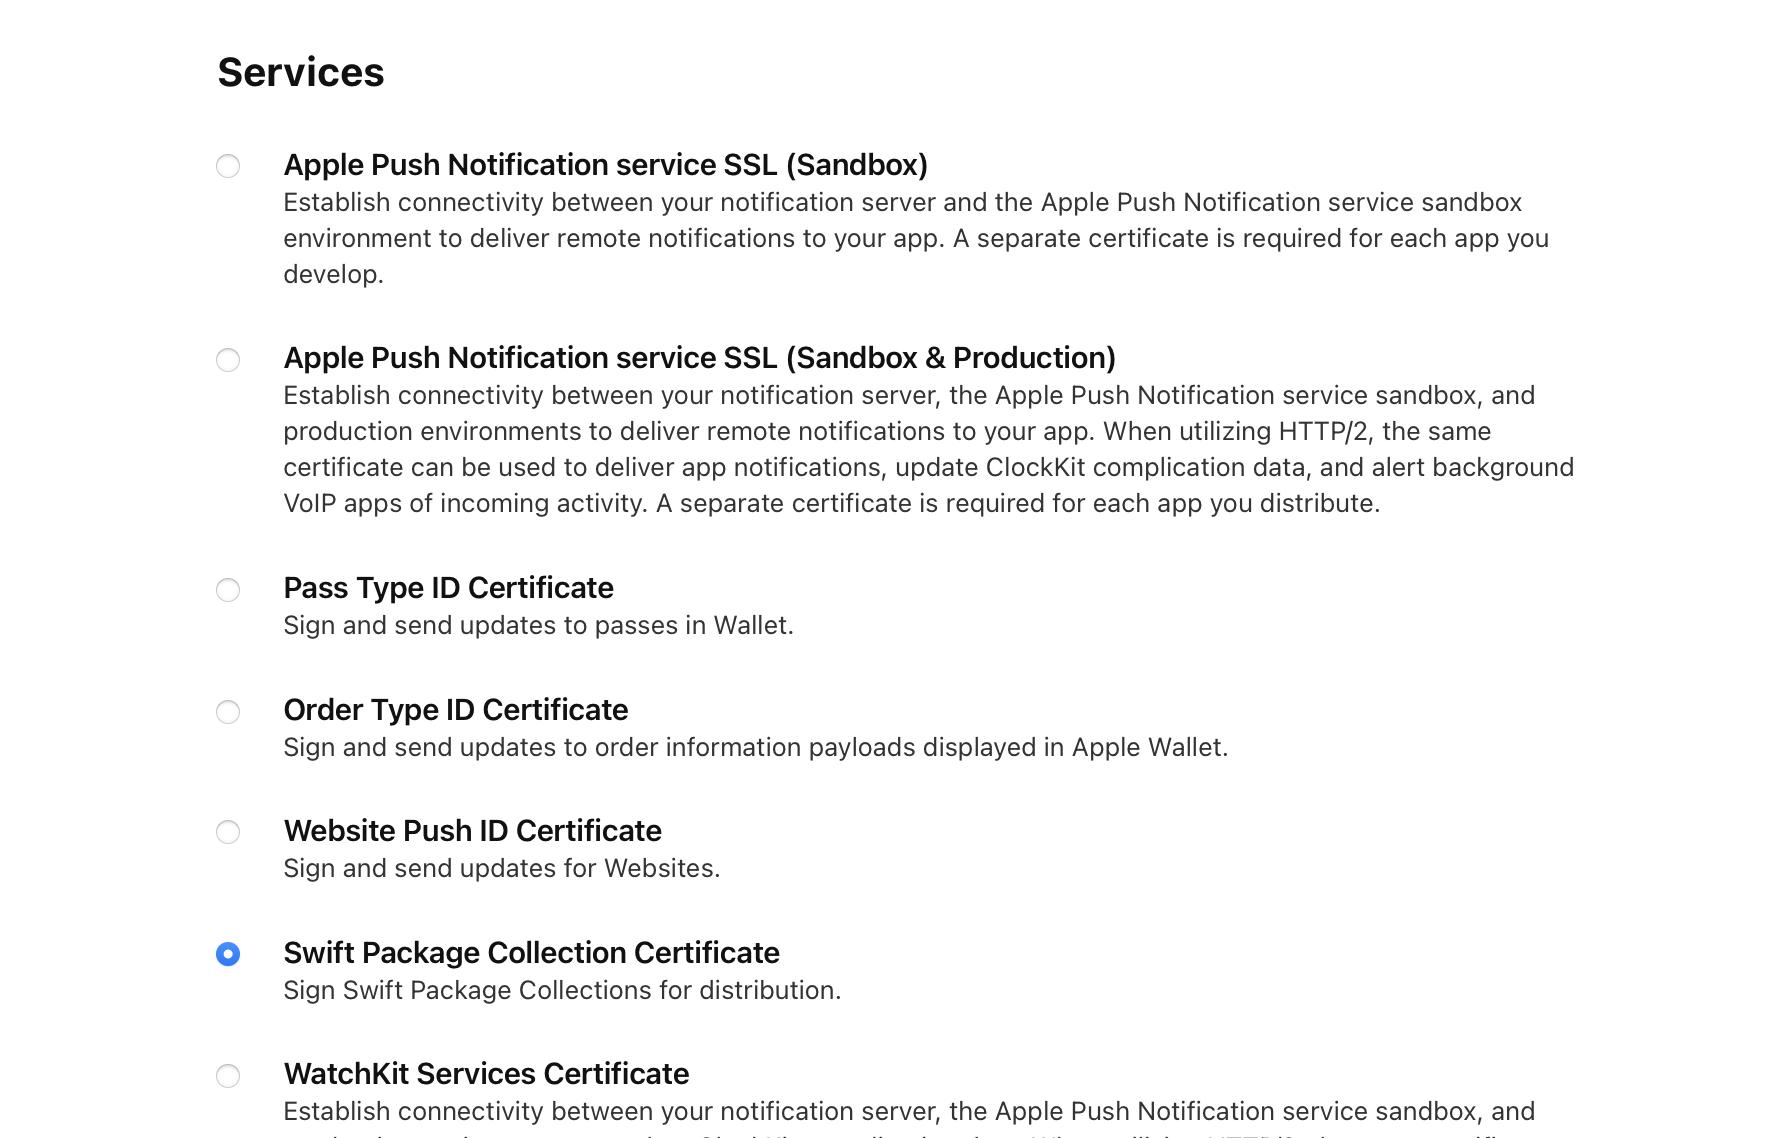
To prevent tampering with the collection, you can sign it using the package-collection-sign command. This command takes the generated json file as an input and generates a signed collection file. This step required generating a signing certificate, which can be created from the Apple developer portal. Check out the SwiftPM documentation for more details on the signing requirements
$ package-collection-sign \
    generated-output.json \
    signed-output.json \
    priivate-key.pem \
    certificate.cer
Step 4: Distribute the collection on github or the Swift Package Index
Once you have generated the package collection file, you can publish it. For public Package Collections, the file can be published to GitHub or the Swift Package Index. The collection can also be shared directly with team members.
Step 5: Begin using the Package Collection
Once your package collection has been published, others can use it by adding the URL of the Package Collection to Xcode. Check out my previous post on using Swift Package Collections to learn more.
This might seem like a lot of work to create a Package Collection. Fortunately, collections don’t need to be created frequently. Instead, the primary use case for a Package Collection is to simplify sharing a library of related packages like those from Pointfree or Vapor. Another compelling use case for package collections is sharing a curated list of dependencies within a team or organization.